
Aethersx2 bios Guide to Installing
AetherSX2 bios is a phenomenal piece of software, bringing the power of PlayStation 2 emulation to Android devices and, in its legacy form, to PCs. However, unlike modern consoles, the PS2’s core operating system is not part of the emulator itself. It’s a separate, critical piece of software called the BIOS (Basic Input/Output System). This guide will walk you through everything you need to know about obtaining and installing the BIOS for AetherSX2.
Disclaimer: The Legalities of the Aethersx2 bios
This is the most crucial section to understand.
- You Cannot Download a BIOS Legally: The PlayStation 2 BIOS is copyrighted software owned by Sony. It is illegal to download a BIOS file from the internet.
- The Legal Way: Dumping Your Own BIOS: The only legal method to acquire a PS2 BIOS is to “dump” it from a PlayStation 2 console that you own. This process involves using homebrew software on a modded PS2 or a memory card with special software (like FreeMCBoot) to extract the BIOS file from your console’s hardware.
- AetherSX2 and You: The developers of AetherSX2 do not and cannot distribute the BIOS with the app. They require users to provide their own, legally dumped BIOS file.
By proceeding, you acknowledge that you understand these legal requirements and are responsible for sourcing the BIOS file through legitimate means.
Part 1: Preparation – What You’ll Need
- The AetherSX2 App: Installed on your Android device or PC. You can get it from the Google Play Store or the official website for the older, ad-free version.
- Your PS2 BIOS File: This is the file you have dumped from your own PS2. A typical, legally dumped BIOS file is named
SCPH-XXXXX.bin(e.g.,SCPH-70012.bin). The numbers correspond to the PS2 model and region (e.g., 39001 for North America, 50004 for Europe). - A File Manager App: Your device’s built-in file manager may work, but a more powerful one like Solid Explorer or CX File Explorer is recommended.
- Your Android Device or PC: Ready for the installation.
Part 2: The Step-by-Step Installation Process
Follow these steps carefully. The process is the same for both Android and the legacy PC version.
Step 1: Locate Your BIOS File
Ensure your BIOS file (e.g., SCPH-70012.bin) is on your device. It’s often downloaded or transferred to the Downloads folder.
Step 2: Create the Aethersx2 bios Folder Structure
AetherSX2 looks for the BIOS in a very specific folder. You need to create it.
- On Android:
- Open your file manager and navigate to your device’s internal storage (not the SD card, unless you’ve configured it as internal storage).
- Look for a folder named
Android. Open it. - Find and open the
datafolder. - Scroll down and find the folder named
**xyz.aethersx2.android**(this is the official app’s folder). Open it. - Open the
**files**folder inside. - Here, you need to create a new folder named
**bios**.
Internal Storage/Android/data/xyz.aethersx2.android/files/bios/ - On PC (Legacy Version):
The process is similar. Navigate to the directory where AetherSX2 is installed. There should already be abiosfolder inside. If not, create one.
Step 3: Copy the BIOS File
- Navigate back to where your BIOS file is located (e.g., the
Downloadsfolder). - Long-press on the BIOS file to select it.
- Choose the Copy or Move option.
- Navigate to the
biosfolder you just created or located (Internal Storage/Android/data/xyz.aethersx2.android/files/bios/). - Paste the BIOS file into this
biosfolder.
Important: Do not put the BIOS file inside another folder within the bios directory. Place it directly inside.
Step 4: Configure Aethersx2 bios to Recognize the BIOS
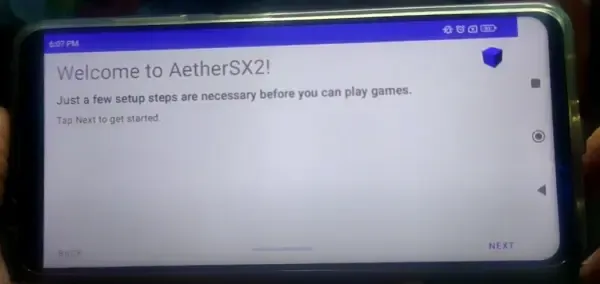
- Open the AetherSX2 app.
- If it’s your first time, the app may automatically proceed to the BIOS setup. If you are in the main game list screen, tap the three-dot menu in the top-right corner and select Settings.
- In the Settings menu, scroll down to the System section.
- Tap on BIOS.
- Success: If you’ve done everything correctly, you should see your BIOS file listed here (e.g.,
USA v02.30(20/02/2006) Console). It automatically reads the information from the file. - Failure: If you see “No BIOS installed,” it means AetherSX2 cannot find the file. Go back and double-check:
- Is the file in the correct
biosfolder? - Is the folder path exactly right?
- Is the BIOS file valid and not corrupted?
- Is the file in the correct
- Success: If you’ve done everything correctly, you should see your BIOS file listed here (e.g.,
- Select your BIOS from the list. This sets it as the active BIOS.
Step 5: Verification (Optional but Recommended)
The best way to verify everything is working is to start a game. However, you can also check within the settings.
- Go back to the main screen of AetherSX2.
- Tap System > Start BIOS. This will boot directly into the PS2’s main menu, just like a real console.
- If you see the iconic blue PS2 splash screen and then the main menu (with the Browser, System Configuration, etc.), congratulations! Your BIOS is installed correctly and is fully functional.
You are now ready to configure your settings and play your PS2 game ISOs.
Troubleshooting Common Issues
- “No BIOS installed” or BIOS not showing up:
- 99% of the time, this is a path issue. Re-check the folder path. It is case-sensitive. It must be
Android/data/xyz.aethersx2.android/files/bios/. - On newer versions of Android, access to the
Android/datafolder may be restricted. Use a dedicated file explorer that can request the necessary permissions. - Ensure the file has a
.binextension.
- 99% of the time, this is a path issue. Re-check the folder path. It is case-sensitive. It must be
- AetherSX2 Crashes when booting the BIOS or a game:
- The BIOS file might be corrupted. Try dumping it again from your PS2.
- The BIOS might be from an incompatible or rare PS2 model. Try using a BIOS from a more common model (like SCPH-39001 or SCPH-70012) if you have multiple consoles.
- Games run with glitches or strange behavior:
- This is rarely a BIOS issue. First, try adjusting AetherSX2’s graphics and speedhack settings. Different games often require different configurations.
Conclusion
Installing the BIOS is the essential first step to unlocking the full potential of AetherSX2. While the process requires careful attention to file placement, it is a straightforward one-time setup. By following this detailed guide, you can ensure a smooth and successful configuration, paving the way for a fantastic PlayStation 2 gaming experience on your modern device. Remember to always respect copyright law and dump your own BIOS whenever possible.